Friday 11 December 2015

My monthly favourites

Hi guys sorry again for not posting sooner but my work load has been so heavy that I am only getting a chance to post once a month even though I have a few posts lined up. So I am now putting my foot down and promising to post once a month at least ubtil I can get a good balance in my life. Anyway enough of my rabblings and onto the post.

So this is a bit a monthly favourites.  This is the first of these I've done so let me know what you think. 😜

The first product is the garnier ultimate blends collection. I use the cocoa butter and coconut oil version and #OMG my hair has never been so silky and smooth (well as smooth as curly hair can be). The products smell amazing and make the hair really manageable and rapidly reduce the frizz as well as give a gorgeous shine. 

As you can see visible shine and a smoother finish


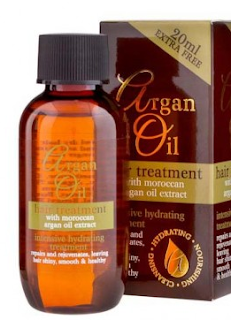
Whilst on the subject of hair I want to talk about this morroccan Argan oil product. It's great as an overnight treatment for dry damaged hair and also helps with growth if massaged into the roots. This product can also be used after washing to add moisture and shine but use liberally. Available in poundland/dealz and savers.


I've also been loving the oz botanicals conditioning treatment. Since I have dry frizzy hair I like it to be well conditioned and soft and this product works well in doing so. In fact since using this along with the garnier range people have been complementing me on how healthy and soft my hair has been looking. And it also smells good which is also a bonus. Plus it's super cheap at just £1. Again available in poundland and savers.


For my skin recently I have been using this garnier intense moisturiser for hands, face and body. I've been using this daily on my face to lock in moisture and I have to say it works really well and my skin has been feeling plumper and hydrated. This is my 3rd pot because it's only a small amount but a steal. Available in savers and online at feelunique 


For my body recently I have been loving the st.tropez tan optimiser body polish. It's a creamy exfoliater which has fine grains and helps to remove dry skin to enhance the look of your tan. Well worth a try. Available on the st.tropez website here..


I've also really been liking the Loreal sublime bronze nourihing body oil. It's a moisturising oil that give the skin a sheen along the shin bones and décolletage area. It looks amazing over a tan, think barbie perfect legs. Available in boots or feelunique for around 10 euro but i pocked it up for a bargain in poundland so just keep an eye out for these bargains because they tend to go very quickly. 


Makeup wise I have been loving the Clinique pop lip colour + primer Lipstick. I got mine in the shade poppy pop. it's a really wearable colour great all year through and will suit a wide range of skin colours. I love this when paired with a sunkissed look and its perfect for daytime where during the festive season. 


I have also recently tried out the revolution velvet liquid lipsticks. I got mine in the shade velvet vamp, velvet rebel and velvet depravity. The velvet depravity Is not a shade I would usually consider wearing but I thought it would be cool to try out for Halloween makeup looks and it works well when mixed with other shades. You can use it to make a gorgeous plum/wine shade when mixed with velvet vamp. However i love the rebel shade. Good lasting power too especially for the price point but can be a little drying on lips. 

velvet vamp

velvet rebel

velvet depravity


The Rimmel provacalips lip lipsticks have also been a favourite of mine this month. I got mine in the shade skinny dipping and little minx. These are amazing and last soo well. Can feel dry after a while (not as drying as the makeup revolution ones) but just top of with a nourishing gloss and your good to go. Will definitely be purchasing more colours. 

skinny dipping

little minx


One further lips product I've been loving recently are the lip liners from primark/penneys. I got mine in the nude and the plum. For the price point these last quite well but what I love the most is the colour payoff. I used the plum for my graduation makeup and my friends were all asking what it was. The nude is also amazing and looks exactly like velvet teddy from Mac when applied to the lips. 

plum

nude


So a lot of lip products there especially for an eyeshadow fanatic like me hahahah. 

Other than lipstick I've been loving the Sue moxley highlighter. It's a pinky tone highlight with a champagne shimmer and is just gorgeous. I've kinda gone into a phase of using more cool tone highlighters now that my skin is a little paler and this makes it look super dewy and fresh even if just applied on its own. Perfect for us fair girls.

The highlighter is the top layer and i love love love it.


A mascara I've been loving this month is the nyc high defintion separating mascara. Its amazing to use on the bottom lashes and gives that long spidery look thats perfect with a smokey eye. 


And of course I can't not mention the urban decay naked smokey pallete. This is the palette I've been waiting for. Cool tone eyeshadows for the perfect deep smokey eyes. Of course the pigment is of the usual UD quality so you can't fault it. I will be doing a post on this soon. 


I tried these foot packs for the first time this month and ohh my god it's heaven for tired feet. You just apply then like socks and leave them on for however long you want but they recommend 20 mins. They leave your feet super soft and moisturised and they smell gorgeous especially the tea tree one. I've already bought a bunch more and can't wait to use them. 


Finally, this product has to be the most adored product I have used this year and it's the mr blanc teeth whitening strips. My teeth are actually white for the first time in my life and i no longer feel conscious about the fluorosis marks on my teeth. Amazing product and enamel safe. 10/10. If you'd like an In depth review of these strips and my results then let me know.


If there's any similar products you think I should try out let me know in the comments below and also give me your opinions on these products. 

Tanya xox 


Sunday 15 November 2015

Brush Guide: 10 essential brushes

Hi again,


Brush Obsession

Ok so it's clear to see that I've began to form a bit of an obsession. I mean do I really need all these brushes???

The answer is no. Nobody needs this many brushes unless of course your a professional. But over the past year or so I can't help but pick up a new brush to try out resulting in this collection (and these are the brushes I've managed not to loose). After all these are the tools to a flawless face. 

Anyway in this blog post I'm breaking down the top 10 essential brushes everyone needs.

Eyes
 Gone are the days when we apply eye shadow with a sponge applicator or worse again our fingers. (Actually can't believe I used to do that hahah) now no eye look is perfected with out the essential eye brushes. 
So to begin with we need a flat shader brush. This brush is essential to apply the base colour, pack on glitter and apply colour to the eyelid area. My favorite brush for this is the 247 from MAC and the brushes from naked 1,2 and 3 work just as well.


from left to right brushes from the naked 1, 2 and 3 palettes


The next brush essential for the eyes is a good blending brush there are a number of different shapes and sizes for this type brush; pointed, round, tapered, angled etc.  Personally I like to use a variety of different blending brushes to create the most flawless look however if I had to choose one I would choose a medium size tapered or angled blending brush as this will help in blending in the outer v as well as the crease area. My favorites are the brush from the naked smokey palette and the angled shadow brush from real techniques.

naked smokey blending brush


RT angled shadow brush


For a great multitasking brush which doubles as a shader brush and blending brush is the real techniques base shadow brush. Turn it on the side and it packs on colour but use the tapered top and it blends effortlessly.


The next essential eye brush is an eyeliner brush and again there are a number of shapes and sizes but each generally do the same job however it is just a matter of preference; some find an angled brush easier than the classic eyeliner brush. My personal favorites are the C463 infinity angle liner and the c438 pro deluxe liner brush from crown brush.

c463

c438


The final essential eye brush is a short smudger or a pencil brush. This style of brush is great for smoking out the lower lash line and softening or smoking out eyeliner and also works well in intensifying the outer v of the eyes. My favorite is the 219 from MAC


Lips 
Lips are simple one good brush will suffice for the lips. Look for a pointed or tapered end to ensure you can line perfectly and then fill in easily with the flat edge. I love the real techniques precision detailer brush. 


Face
The first of the key face brushes is a good foundation brush. These vary depending on skin type,foundation type and the level of coverage you want. For example if your using a mineral powder foundation a flat foundation brush won't work. So to help with this I have a brush for each type. 
Firstly for dry skin I would recommend a classic flat foundation brush such as the salon services flat foundation brush, as this will not raise any dry patches on the skin however I feel that the real techniques expert face brush does a fabulous job in buffing and blending at the same time to create a pixel perfect look. This is provided you are using a liquid or cream foundation.
Salon services flat foundation brush


RT expert face brush


For combination/ oily skin I would recommend using a kabuki style brush, like the black canvas F20 flat buffer brush. if you are using a cream or liquid foundation as this can be nicely worked into the skin for a flawless finish however a flat foundation brush or the real techniques expert face brush will work just as well.


When using powder foundations i recommend using a buffing brush or fluffy kabuki brush again to blend well into the skin. My favorite is the real techniques buffing brush.


For all skin types we can also use a stippling brush which will provide a lighter coverage or a more blended build-able coverage. I like the real techniques stippling brush. A kabuki brush will also work well on all skin just be careful not to lift dry patches.


Another essential is a good concealer brush. For this brush look for a small flat brush as this provides the best coverage for concealing spots and dark circles etc and wont raise dry or flaky skin on spots. Try the blank canvas F17 brush.


The next essential brush is a powder brush. Again these vary in size and style. If you have dry skin or just want a light coverage try a duo-fiber brush for this like the real techniques duo fiber face brush. For a fuller coverage go with a basic fluffy brush like the MAC 134 brush and for extreme coverage try a buffing brush. However in all cases try and get a large style for minimal effort.

RT Duo fiber


MAC 134 large powder brush


The next brush is a contour/bronzer brush. For this you want an Angled shape of a tapered brush for this. These shapes are the best for multi tasking however you can use a specific contour brush. If you don't contour these brushes will still work well for bronzing the circumference of the face. I like the real techniques contour brush and the crown brush c405 brush.

rt contour brush

c408 angled contour brush

Another essential is a blush brush. This brush can be used for blusher and powder highlighting. In this case it is more the technique of applying the Blush than the brush however it is important. I recommend a dense brush in a medium size so you get the best pigmentation but the colour will not be spread everywhere. I really like the real techniques cheek brush.

RT cheek brush


And there you have it. The 10 essential brushes. I would also like to give a special mention to the blending sponge. If you have dry skin this will be your favorite base tool but again works well with all skin types and provides an effortless flawless look. The real techniques expert blending sponge is amazing.


These are my favorite brushes to create a perfected look. If your building a kit I hope this has helped you and if there are any brushes you love and think I should try let me know in the comments below 

Tanya xox 

Saturday 24 October 2015

Get the look. Katy Perry inspired makeup look.

Hi welcome back. Sorry i have been totally MIA I've been super busy as I've just started full time work, and have been trying to find time in my life to get back to this and its been so difficult to try and get the work life balance right but im back and hopefully this is it for now. I've a few posts lined up so stay tuned. 


For today's post I'm going to show you how to recreate a celebrity look. I'm thinking of starting a new series of posts called get the look. In which I will attempt to recreate a celebrity makeup look. So if you think this is a good idea or have any requests comment below. 

So for today's look in recreating a Katy Perry look. 
I have to say I have a slight obsession with Katy Perry so obviously I had to recreate her look first. 
Today's look is going to be a 2 in 1. Where I will recreate 2 of her looks which are both very different but the base is the same so I thought why not.  In the 1st look the eyes are the focus and in the 2nd it's the lips. So you can decide which feature you prefer to play up or you could combine both for a super dramatic look. 


The first look is inspired by her look for the prismatic world tour. I absolutely adored her look here and I think it really made her already stunning eyes really sparkle. I actually attended the concert and as soon as I seen her I thought ohh my gawd how gorgeous is she and that makeup 😱 I have to recreate.


As you can see the eyes are really stand out with a dramatic winged liner and a full on glitter liner on the bottom lash line with just a glossy pink lip to complete the look. 

Face

  • For the base use an illuminating primer this will blur fine lines and give us a smooth canvas for applying our foundation whilst giving us a soft glow. I used the Loreal lumi magique primer for this. 
  • Katy's foundation is always flawless and I read that she uses makeup forever HD foundation so I used this also as my base however Loreal true match will work just as well. I then applied Rimmel wake me up concealer in a triangle shape under the eyes, down the bridge of the nose and on the forehead to draw light to these places. 
  • In this look Katy has a very soft focus contour which makes the look super natural but obviously I was trying to recreate the look so I went a bit heavier and used a cool toned contour shade on the hollows of the cheeks along the jawline and down the contours of the nose to recreate the shape of hers and blended it out really well with the NYC sunny bronzer and it looked seamless. I also placed the bronzer around the circumference of my forehead to narrow it and give an all over glow. 
  • I applied MAC peachy keen blush on the apples of the cheeks and then applied a pink champagne highlighter by Sue moxley to the high points of the cheeks and on the tip of the nose and the Cupid bow. 

Eyes 

  • For the eyes I used a matte pale pink eye shadow as the base all over the lid. I used Rimmel magnif'eyes mono eye shadow in poser or Try essence baked eye shadow in cake pop for an extra little bit of shine to the lid.
  • Then blend a neutral medium matte brown into the crease and blend upwards. I used naked from the urban decay naked palette. Then add a deeper taupe brown such as tease from the urban decay naked 2 palette to the upper crease sort of creating a soft cut crease.
  • Then apply your favorite liquid or gel eyeliner to create a sharp winged eyeliner. For myself I like my liner to be really dark and pigmented so I used the rimmel exaggerate eye liner to get the shape perfect and then went over it with some maybelline studio gel liner mixed with a drop of inglot duraline for a smooth ultra pigmented finish but this is optional of course. 
  • After this I applied a silver steel coloured eyeliner to the waterline it's not as harsh as black but gives a sultry yet sparkly look. I used the Avon super shock gel eyeliner in steel.
  • After this I applied a silver shimmer shadow on the bottom lash line. I used verve from the naked 2 palette and then applied a glitter liner over the top of this for the ultimate sparkly look. I used urban decay heavy metal eyeliner glitter in glamrock but any similar eyeliner will work.
  • After this I applied a champagne shimmer eyeshadow to the inner corner of the eyes I used virgin from the naked palette. 
  • Finish with a generous coat of Avon super shock mascara and NYC super curl mascara  to my top and bottom lashes and I then applied a set of dramatic lashes for the ultimate glam look. Try the Katy Perry collection by eylure.

Lips

  • For the lips I used a pink nude lip liner  to fill in the whole lips. I then went over this with a similar shade of lipstick try avon ultra colour lipstick in pout and finally finish with a soft pink gloss or leave it out if you'd prefer. I used MAC prolongwear lipglass in love love love.

This is the finished look. 


For the second look the eyes are not as dramatic but the lips are. This look is a soft blend smokey eye with a dark burgundy matte lip and of course a full lash look. 


Face: 

  • Again the base is the same as the previous look however I would switch up the blush and try a more mauve tone or something with a cool or purple undertone. I used mac blush in plum foolery I would also go a little easier on the bronzer and instead make the contour more defined. 

Eyes

  • For the eyes I applied a cream coloured eye shadow with a champagne gold shimmer reflect I used bootycall from the urban decay naked 2 palette
  • I then applied a black kohl eyeliner along the upper lash line winging it out at the end once you have done this smudge it out very slightly I used Avon glimmer sticks in blackest black and then take a blending brush dipped in a matte black eye shadow such as blackout from the naked 2 palette and diffuse the outer wing liner and blend in towards the lid for a sultry smokey look. 
  • Apply a shimmering nude eyeliner in the waterline to draw light to the eyes and finish off the look by applying a rose gold eye shadow on the lower lash Line I used trick from the naked 3 palette.
  •  After this apply a generous coat of mascara the same as the previous look and then a short yet full set of lashes. Try the Katy Perry for eylure collection. 

Lips


I hope you enjoyed this blog post and if any of you recreate it is love to see your looks so tag me on Instagram or Twitter and of course you don't have to use the exact products I used because I know some of them are expensive but just switch them up for similar products and it will work just as well.  

Lots of love 
Tanya xox 

Monday 14 September 2015

winter sun glow and fake freckles. How to.

Keeping to my promise of a new post weekly yayyy.

Now that summers finally leaving us and fall is coming at us full throttle were all dreading that dull, dry winter skin. The bronze glow is fading and the sunkissed shimmer is gone. Why cant we just stay like this for just another while right??

That's were im going to help. I'm going to give you a few tips on how to keep the sunkissed glow without spending hours on a sunbed and looking totally false. This is a how to fake a winter sun glow.

So since its fall we should probably be easing of the fake tan and embracing the fall fashion stables such as tights and knee high boots and if necessary going for a more natural hint of colour. To do this we shoould switch out our regular self tanners and try a moisturizer with a hint of tan. This way we are helping prevent dry skin and get that glow.

Its a soft natural colour that's build-able and leaves us with lasting silky smooth skin.  

As we all know when winter hits our faces begin to look a lot more dull and its hard to get a healthy glow know matter how much highlighter we use. For this I have 3 tips.
  1. Drink lots and lots of water - When it starts to cool down we often find that we drink much less water and because of this our skin starts to dehydrate and looses colour so we end up looking totally drained. So instead of easing off we should up our intake. 
  2. Moisturise, Moisturise and moisturise some more - In order to lock in the moisture we have given our skin from drinking water we should use a good quality moisturuser for dry to dehydtated skin. Aim to do this at least twice daily and we will see an improvment in now time.Try No7 beautiful skin cream for dry/very dry skin or No7 beautiful skin dry skin rescue. Further to this we could use a hydration mask once a week to maintain the skins quality. Try No7 beautiful skin hydration mask for dry/very dry skin or Glamglow thirsty mud. If your skin is severly dehydrated use an emulsifying ointment which will help act as an extra barrier to protect your skin. 
  3. Exfoliate - Often this is a key step that people forget to do and its so so important if we want bright fresh skin. Exfoliater removes the dead and dull skin cells and leaves a fresh healthy layer underneath. Use a good quality exfoliater 2-3 times a week and preferably use one for dry skin also. Try No7 beautiful skin radiance exfoliater for normal/dry skin or Liz earle hot cloth polish.

Once we have followed these steps we can now fake that radiant winter sun skin with makeup.

  • Use a natural looking base. Not too dewy yet not matt. Somewhere in between in perfect. Look for a satin finish foundation for the perfect look but others will work too. 
  • Then apply a golden or peach based highlighter to the high points of the face nothing too pink or white based as this wont achieve the sunkissed glow and DON'T over apply either. Use liberally.
  • After this apply a light bronzer something very natural. My favourite is Essence sun club bronzer in blondes-lighter skin. Its the perfect tone and looks super natural plus it smells like coconut so thats an addded bonus. Apply the bronzer to the circumfrence of the face in a 3 shape at either side. Then to slightly accentuate the cheek bones apply a light contour shade. I love the charlotte tilburry filmstar bronze and glow contour shade because its got a slight shimmer which enhances the bronze glow we have now achieved. Try the dupe here.
  • This step is optional but I think it looks great. Apply a few tiny freckles across the bridge of your nose along the cheek bones and a tiny scattering in the forehead. Use a freckle pencil or a light brown toned matte pencil to dot over these areas and then blot out with your finger to create a natural look. You can then use a matte shadow to intensify a few of the freckles and you will have sunkissed freckles that are totally realistic looking and give you a youthful fresh look. Even Kendall Jenner is sporting this look and if that's not encouragement to give it a go I don't know what is. 
  • The next step is to keep the eyes simple just a wash of champagne over the eyes and a bronze colour in the crease. Then apply a black eyeliner on the top lash line just to mimic a thicker lash bed and apply a good coating of your favorite mascara, And tightline with a brightening nude/champagne colour. 
  • Then to give a further hint of summer use an orange or coral red lipstick and gloss and voila sunkissed natural looking winter skin that looks effortless.

Kendall rocking the trend.


The finished look will be something like this


As you can see its very natural and fresh looking
Excuse the freshly washed messy hair :P


All the Products mentioned are things i have used and would personally recommend. :)

Hope this was useful and gave a little bit of inspiration

Love always

Tanya xox